Navigating DIY Skin Tag Removal: A Comprehensive Guide to Safety, Risks, and Professional Alternatives
Skin tags are small, soft, benign growths that commonly appear on the skin. While usually harmless, many individuals seek ways to remove them, often for cosmetic reasons or because they cause irritation when rubbed by clothing or jewelry. The internet is filled with various do-it-yourself (DIY) methods for skin tag removal, promising quick and easy solutions from the comfort of home. However, it's crucial to understand that attempting to remove skin tags yourself carries significant risks, ranging from infection and scarring to misdiagnosis of a more serious skin condition. This comprehensive guide will explore the nature of skin tags, delve into the popular DIY removal methods, highlight their inherent dangers, and strongly advocate for the safest and most effective professional alternatives. Our goal is to provide you with the knowledge needed to make informed decisions about your skin health, always prioritizing safety above convenience.
Key Takeaways
Skin tags are generally harmless but can be mistaken for more serious conditions. Always consult a healthcare professional to confirm a diagnosis before attempting any removal.
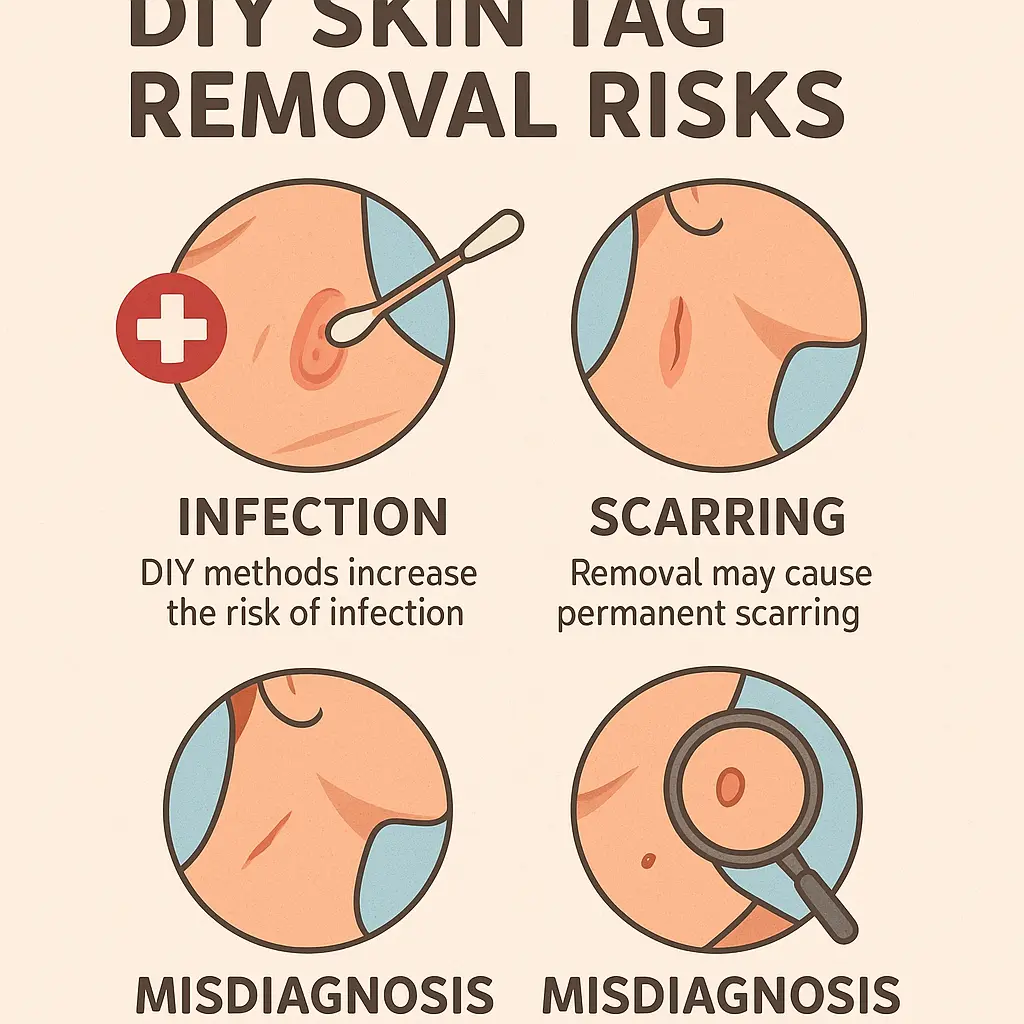
DIY skin tag removal methods carry significant risks. These include infection, scarring, pain, bleeding, incomplete removal, and even nerve damage.
Common home remedies like apple cider vinegar, tea tree oil, and ligation lack strong scientific backing for safety and effectiveness. Their use can lead to adverse skin reactions.
Professional medical removal is the safest and most effective option. Dermatologists and general practitioners use sterile techniques like excision, cryotherapy, and electrocautery, minimizing risks.
Prioritize your health and safety. If you have a skin tag that bothers you, or if you're unsure about any skin growth, seek advice from a qualified medical professional.
Understanding Skin Tags: What Are They Really?
Skin tags, medically known as acrochordons, are small, soft, flesh-colored or slightly darker growths that hang off the skin. They are extremely common and usually harmless, posing no medical threat. Think of them like tiny, soft balloons attached to your skin by a small stalk. ✨
What Causes Skin Tags?
While the exact cause isn't fully understood, several factors are believed to contribute to their development:
Friction: Skin tags often appear in areas where skin rubs against skin, such as the armpits, groin, neck, and eyelids. Clothing or jewelry rubbing against the skin can also contribute.
Obesity: Individuals who are overweight or obese tend to develop more skin tags, likely due to increased skin folds and friction.
Genetics: If your family members have skin tags, you might be more prone to developing them.
Aging: Skin tags become more common as people get older.
Hormonal Changes: Pregnancy can lead to an increase in skin tags due to hormonal fluctuations.
Insulin Resistance: There's a link between skin tags and conditions like type 2 diabetes and insulin resistance.
Human Papillomavirus (HPV): Some studies suggest a possible link between certain types of HPV and skin tag development, though this is not definitively proven as the primary cause.
Where Do Skin Tags Appear?
Skin tags can appear almost anywhere on the body, but they are most commonly found in:
Neck: Especially where necklaces rub.
Armpits: Due to skin-on-skin friction.
Groin folds: Another area of skin-on-skin contact.
Eyelids: Delicate areas where friction from blinking or makeup can occur.
Under the breasts: Common in women, particularly those with larger breasts.
Upper chest/back: Less common but can still appear.
Are Skin Tags Dangerous?
In almost all cases, no, skin tags are not dangerous. They are benign (non-cancerous) growths. They don't spread, and they don't turn into cancer. However, they can be a nuisance. They might:
Become irritated or inflamed if they rub against clothing or jewelry.
Bleed if twisted or scratched.
Cause cosmetic concerns, especially if they are large or in a visible area.
When to Worry About a Skin Tag?
While skin tags are typically harmless, it's crucial to be aware of certain signs that might indicate a different, potentially more serious skin condition.
Always seek medical attention if a skin growth:
Changes in size, shape, or color rapidly.
Has irregular borders or multiple colors.
Is bleeding or oozing spontaneously without trauma.
Is painful, itchy, or tender.
Appears suddenly and grows quickly.
Doesn't look like a typical skin tag (e.g., it's firm, nodular, or deeply pigmented).
"Any suspicious skin growth should be evaluated by a healthcare professional to rule out more serious conditions like melanoma or other skin cancers. Self-diagnosis can be dangerous."
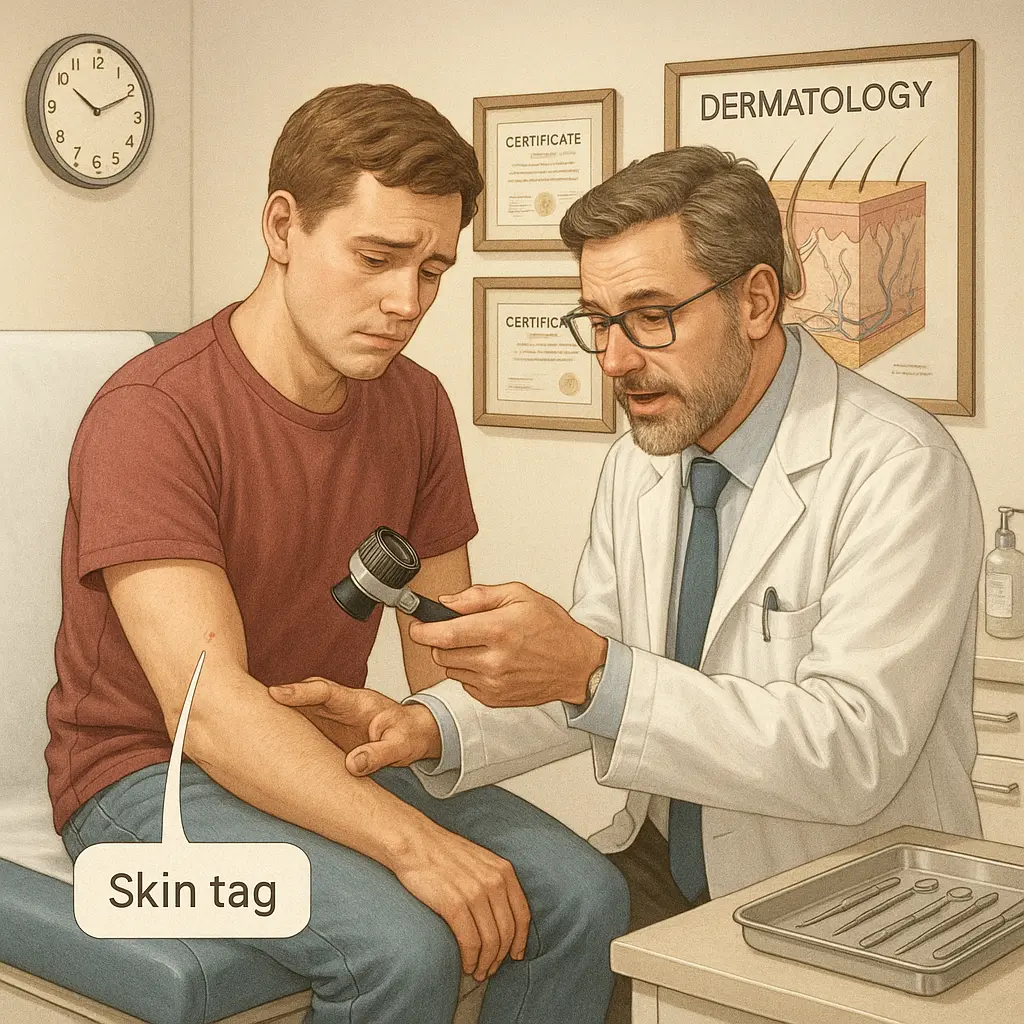
It's impossible for an untrained eye to definitively distinguish a benign skin tag from a mole, wart, or even a cancerous lesion. This is why professional diagnosis is the first and most critical step before considering any removal method. You can learn more about various skin conditions that require professional attention by visiting resources like the conditions page at The Minor Surgery Center.
The Allure of DIY Skin Tag Removal: Why People Consider It
With the rise of online information and a desire for quick fixes, many people turn to DIY methods for skin tag removal. The appeal is understandable, but it's often based on misconceptions about safety and effectiveness.
Cost-Effectiveness
One of the primary reasons people consider DIY methods is the perceived cost savings. Professional removal procedures, while generally affordable, do incur a fee for consultation and the procedure itself. Home remedies, using common household items or inexpensive kits, seem like a budget-friendly alternative.
Privacy and Convenience
The idea of removing a skin tag in the privacy of one's own home, without needing to schedule an appointment or visit a clinic, is appealing to many. It offers a sense of convenience and avoids potential embarrassment, especially if the skin tag is in a sensitive or private area.
Misconceptions About Safety
A significant driver for DIY attempts is the belief that because skin tags are harmless, their removal must also be simple and safe, even at home. This overlooks the complexities of skin anatomy, the risk of infection, and the potential for misdiagnosis. Online testimonials and unverified "success stories" can further fuel these misconceptions, leading individuals to believe that DIY is a viable, risk-free option.
The Critical Risks of DIY Skin Tag Removal: A Word of Caution
While the idea of removing a skin tag yourself might seem appealing due to cost or convenience, the risks far outweigh any perceived benefits. Attempting DIY removal can lead to a host of complications, some of which can be serious and long-lasting.
Misdiagnosis: Is It Really a Skin Tag?
This is arguably the most significant risk. What you believe to be a harmless skin tag could, in fact, be:
A mole: Moles (nevi) can be benign, but some can be atypical or even cancerous (melanoma). Removing a mole yourself can delay a crucial diagnosis of skin cancer, allowing it to spread.
A wart: Warts are caused by viruses and can spread if not treated properly. DIY removal methods might not be effective and could lead to more warts.
A neurofibroma: These are benign nerve sheath tumors that require professional evaluation.
A seborrheic keratosis: These are common, benign skin growths that often appear waxy or "stuck on." While harmless, they can resemble other lesions.
Basal cell carcinoma or squamous cell carcinoma: Less aggressive forms of skin cancer that still require professional treatment.
"Self-diagnosing a skin growth is like trying to fix a complex engine without knowing how it works. You might cause more damage than good, and miss a critical underlying problem." 🚨
A healthcare professional, such as a dermatologist, has the training and tools (like a dermatoscope) to accurately diagnose skin lesions. They can distinguish between benign growths and those that require further investigation, such as a biopsy.
Infection: A Major Concern
Any breach of the skin barrier, especially with unsterilized tools or unclean hands, creates an open door for bacteria, viruses, and fungi.
Bacterial infections: Can lead to redness, swelling, pus, pain, and fever. In severe cases, a localized infection can spread, leading to cellulitis or even sepsis, a life-threatening condition.
Viral infections: If the growth was a wart, DIY removal could spread the virus to other areas of your skin or to others.
Fungal infections: Less common but still possible, leading to persistent irritation.
Think about it: professional clinics adhere to strict sterilization protocols to prevent infections. Your home environment, no matter how clean, cannot replicate a sterile medical setting.
Scarring and Pigmentation Changes
DIY methods often involve crude techniques that can damage the surrounding skin.
Scarring: Cutting, tearing, or burning the skin improperly can leave permanent scars, which can be more cosmetically bothersome than the original skin tag. The risk of scarring is particularly high in sensitive areas like the face or neck.
Hyper-pigmentation (darkening): The skin around the treated area might become darker due to inflammation or improper healing.
Hypo-pigmentation (lightening): Conversely, the skin might lose its pigment, leaving a lighter patch.
Pain and Bleeding
Removing a skin tag, especially by cutting or tying, can be very painful, as skin tags contain nerves and blood vessels.
Pain: Without local anesthesia, the process can be excruciating.
Bleeding: Skin tags, even small ones, can bleed significantly when cut or otherwise traumatized. Controlling the bleeding at home can be difficult, especially if the tag is larger or in an area with a rich blood supply. Excessive bleeding can also increase the risk of infection.
Incomplete Removal and Recurrence
Many DIY methods, particularly those involving topical applications, might not completely remove the skin tag. If part of the tag remains, it can lead to:
Recurrence: The tag might grow back.
Inflammation: The remaining tissue can become irritated and inflamed.
Unsightly appearance: The partially removed tag might look worse than before.
Professional removal ensures the entire tag is removed, minimizing recurrence.
Nerve Damage and Other Complications
While rare, improper removal, especially in sensitive areas like the eyelids or near major nerves, could theoretically lead to nerve damage or other complications. For example, attempting to remove a skin tag on the eyelid could injure the eye itself.
"Your skin is your body's largest organ and its first line of defense. Treating it with anything less than professional care can have serious consequences."
It's vital to recognize that healthcare professionals are trained to perform these procedures safely, effectively, and with minimal risk of complications. They understand the anatomy of the skin and use appropriate tools and techniques.
Common DIY Skin Tag Removal Methods: Exploring the Approaches (and Their Dangers)
Despite the significant risks, many individuals still attempt to remove skin tags using various home methods. It's crucial to understand how these methods are supposed to work, but more importantly, to be aware of their inherent dangers and lack of scientific validation for home use.
Disclaimer: The following descriptions of DIY methods are for informational purposes ONLY and are presented with strong warnings against their use. This content does NOT endorse or recommend any of these methods for self-treatment. Always consult a healthcare professional before attempting any skin tag removal.
Method 1: Ligation (Tying Off) 🧵
Ligation involves cutting off the blood supply to the skin tag, causing it to wither and fall off.
How It's Supposed to Work: A very thin thread (like dental floss or surgical thread) is tied tightly around the base of the skin tag. The idea is that by cutting off the blood flow, the cells in the skin tag will die, and the tag will eventually dry up and fall off, typically within a few days to a week.
Risks and Downsides:
Pain: Tying a tag off can be painful, especially if it's large or in a sensitive area.
Infection: If the thread or the skin isn't clean, bacteria can be introduced, leading to infection. The dying tissue is also prone to infection.
Incomplete Removal: If the thread isn't tight enough or slips, the blood supply might not be completely cut off, leading to partial removal or irritation rather than the tag falling off.
Bleeding: The skin tag might bleed when it finally falls off, or if the thread cuts into the skin.
Scarring: Incorrect ligation can lead to scarring or discoloration.
Misdiagnosis: The biggest risk remains that you're tying off something that isn't a skin tag.
Step-by-Step (with strong warnings):
DO NOT ATTEMPT THIS AT HOME. This method is described for informational purposes only, to highlight its dangers.
Identify the skin tag: Ensure it has a clear stalk. (But remember, you cannot self-diagnose accurately!)
Prepare the area (if you were to attempt this): Clean the skin around the tag thoroughly with rubbing alcohol or an antiseptic wipe. (Still, this doesn't guarantee sterility.)
Tie the thread: Take a piece of very thin, clean thread (e.g., dental floss, fishing line, or a very thin cotton thread). Tie it tightly around the base of the skin tag, as close to the skin as possible. Make sure it's snug enough to cut off circulation but not so tight that it cuts into the surrounding healthy skin immediately.
Leave it: The tag is expected to change color (darken) as it loses blood supply and eventually fall off. This can take several days.
Monitor for complications: Watch for signs of infection (redness, swelling, pus, increased pain) or excessive bleeding. (If these occur, you'll need immediate medical attention.)
Why this is a bad idea: Ligation is a medical procedure when done by a professional, using sterile tools and proper technique. At home, it's uncontrolled, unsterile, and highly risky.
Method 2: Excision (Cutting Off) 🔪
This method involves physically cutting the skin tag off the skin.
How It's Supposed to Work: The skin tag is snipped off at its base using sharp tools.
Risks and Downsides:
Extreme Risk of Infection: Using non-sterile scissors, nail clippers, or razors introduces a massive risk of bacterial infection. Even if you "sterilize" them at home, they are not medically sterile.
Significant Bleeding: Skin tags have a blood supply. Cutting them can lead to profuse bleeding that is difficult to stop at home.
Severe Pain: Without local anesthesia, cutting off a skin tag is extremely painful.
Scarring: Improper cutting can lead to permanent, unsightly scars.
Incomplete Removal: If not cut cleanly at the base, part of the tag might remain, leading to regrowth or irritation.
Nerve Damage: Especially in sensitive areas, there's a risk of cutting nerves or vital structures.
Misdiagnosis: Again, cutting off a mole or a cancerous lesion can have devastating consequences by delaying proper medical diagnosis and treatment.
Step-by-Step (with strong warnings):
DO NOT ATTEMPT THIS AT HOME. THIS IS EXTREMELY DANGEROUS.
Identify the skin tag: (Self-diagnosis is unreliable.)
Prepare the area (if you were to attempt this): Clean the skin. (Still, not sterile.)
The "cutting": Using a "sterilized" pair of small, sharp scissors, nail clippers, or a razor blade, attempt to snip the skin tag off at its base.
Control bleeding: Apply pressure with a clean cloth. (This might not be enough to stop bleeding.)
Aftercare: Apply an antiseptic. (But infection is still highly likely.)
Why this is a bad idea: This is essentially performing minor surgery on yourself without medical training, sterile equipment, or anesthesia. It's a recipe for disaster. Professional excision is done under sterile conditions by a trained medical professional using local anesthetic and appropriate tools.
Method 3: Cryotherapy Kits (Home Freezing) ❄️
These kits typically use a mixture of dimethyl ether and propane to freeze the skin tag.
How It's Supposed to Work: The cold spray or applicator is applied to the skin tag, aiming to freeze the tissue, which then dies and falls off.
Risks and Downsides:
Effectiveness: Home kits are often not cold enough to effectively freeze the entire skin tag, especially larger ones, leading to incomplete removal or no effect at all.
Skin Damage: It's easy to accidentally freeze the surrounding healthy skin, leading to:
Blistering: Large, painful blisters can form.
Frostbite: Actual tissue damage from excessive cold.
Scarring: Permanent scars or discoloration.
Pain: The freezing process can be quite painful.
Misdiagnosis: Freezing a mole or cancerous lesion can be dangerous, as it destroys the tissue, making it impossible for a pathologist to analyze it later for cancer cells.
Multiple Applications: Often requires several applications, increasing the risk of adverse reactions.
Step-by-Step (with strong warnings):
DO NOT RELY ON HOME KITS FOR SAFETY OR EFFICACY. They are not a substitute for professional cryotherapy.
Read instructions carefully (if you were to attempt this): Each kit varies.
Prepare the applicator: Attach the foam tip or activate the spray.
Apply to the skin tag: Hold the applicator directly onto the skin tag for the recommended duration (usually 10-20 seconds). Avoid contact with surrounding skin.
Observe: The tag might blister, darken, and eventually fall off over days to weeks.
Monitor for complications: Watch for severe pain, large blisters, signs of infection, or failure of the tag to fall off.
Why this is a bad idea: Professional cryotherapy uses liquid nitrogen, which is significantly colder and more precisely applied by a trained professional, minimizing damage to surrounding tissue and ensuring effective removal.
Method 4: Apple Cider Vinegar (ACV) 🍎
ACV is a popular home remedy for various ailments, including skin tags.
How It's Supposed to Work: The acidic nature of ACV is believed to break down the tissue of the skin tag, causing it to dry out and fall off.
Risks and Downsides:
Skin Irritation and Burns: ACV is acidic and can cause chemical burns, redness, stinging, and irritation to the surrounding healthy skin, especially with prolonged contact.
Ineffectiveness: There is no strong scientific evidence to support ACV as an effective or safe method for skin tag removal. It may not work at all, or only partially.
Pain: The acidic burn can be quite painful.
Scarring: Chemical burns can lead to permanent scarring or discoloration.
Infection: Open sores from irritation are susceptible to infection.
Misdiagnosis: Applying ACV to a cancerous lesion can irritate it and delay proper diagnosis.
Step-by-Step (with strong warnings):
DO NOT USE ACV FOR SKIN TAG REMOVAL. It can cause chemical burns.
Clean the area (if you were to attempt this):
Apply ACV: Soak a small cotton ball in apple cider vinegar.
Secure it: Place the soaked cotton ball directly over the skin tag and secure it with a bandage or medical tape.
Leave on: Leave it on for several hours or overnight, repeating daily.
Monitor: Watch for the tag to darken and fall off, but also for severe irritation or pain.
Why this is a bad idea: ACV is not designed for skin lesion removal. Its acidity is too harsh for delicate skin and can cause significant damage.
Method 5: Tea Tree Oil 🌳
Tea tree oil is an essential oil known for its antiseptic and anti-inflammatory properties.
How It's Supposed to Work: It's believed that the drying properties of tea tree oil help to shrink and dry out the skin tag.
Risks and Downsides:
Skin Irritation: While often diluted, pure tea tree oil can cause allergic reactions, redness, itching, and contact dermatitis, especially in sensitive individuals or with prolonged use.
Ineffectiveness: Like ACV, there's limited scientific evidence to prove its efficacy in removing skin tags.
Slow Results: If it works at all, it's a very slow process, requiring daily application for weeks.
Misdiagnosis: Applying to a suspicious lesion can delay proper diagnosis.
Step-by-Step (with strong warnings):
DO NOT RELY ON TEA TREE OIL FOR SKIN TAG REMOVAL. It's not a proven medical treatment.
Dilute: Dilute tea tree oil with a carrier oil (like coconut or olive oil) to reduce irritation. (Even diluted, irritation can occur.)
Clean the area (if you were to attempt this):
Apply: Apply a few drops of the diluted mixture directly onto the skin tag using a cotton swab.
Repeat: Repeat daily for several weeks.
Monitor: Watch for signs of irritation or allergic reaction.
Why this is a bad idea: Essential oils are potent and can cause adverse reactions. There's no guarantee of effectiveness, and it's not a medically recognized treatment for skin tags.
Method 6: Iodine 🧪
Some home remedies suggest applying iodine to dry out skin tags.
How It's Supposed to Work: Iodine is an antiseptic and is thought to dehydrate the skin tag, causing it to shrink and fall off.
Risks and Downsides:
Skin Staining: Iodine will stain the skin brown, which can be difficult to remove.
Skin Irritation: It can cause dryness, peeling, and irritation of the surrounding skin.
Allergic Reactions: Some individuals may be allergic to iodine.
Ineffectiveness: There's no scientific backing for iodine as a skin tag removal method.
Misdiagnosis: Applying iodine can obscure the appearance of a lesion, making professional diagnosis difficult.
Step-by-Step (with strong warnings):
DO NOT USE IODINE FOR SKIN TAG REMOVAL. It's not intended for this purpose and can cause irritation and staining.
Clean the area (if you were to attempt this):
Apply: Apply a small amount of iodine (e.g., Lugol's iodine) directly to the skin tag using a cotton swab.
Repeat: Repeat daily.
Monitor: Watch for excessive irritation or staining.
Why this is a bad idea: Iodine is primarily an antiseptic, not a skin tag removal agent. Its use for this purpose is unproven and potentially harmful.
Method 7: Garlic 🧄
Garlic is known for its antimicrobial and anti-inflammatory properties, leading some to suggest it for skin tag removal.
How It's Supposed to Work: The enzymes and compounds in garlic are believed to break down the skin tag tissue.
Risks and Downsides:
Skin Burns: Raw garlic is highly potent and can cause significant chemical burns, blistering, and irritation to the skin, especially with prolonged contact.
Odor: The strong smell of garlic can be unpleasant and persistent.
Ineffectiveness: There's no scientific evidence to support garlic as an effective or safe method for skin tag removal.
Allergic Reactions: Some individuals may be allergic to garlic.
Scarring: Burns from garlic can lead to permanent scarring.
Step-by-Step (with strong warnings):
DO NOT USE GARLIC FOR SKIN TAG REMOVAL. It can cause severe skin burns.
Prepare the garlic (if you were to attempt this): Crush a fresh garlic clove into a paste.
Apply: Apply the paste directly onto the skin tag.
Secure: Cover with a bandage.
Leave on: Leave it on overnight.
Repeat: Repeat daily.
Monitor: Watch for severe burning, pain, or blistering.
Why this is a bad idea: The compounds in garlic are too strong for direct, prolonged skin contact and can cause painful and damaging chemical burns.
Method 8: Duct Tape 🩹
The idea behind duct tape removal for skin tags is similar to its purported use for warts – suffocation and irritation.
How It's Supposed to Work: A small piece of duct tape is placed over the skin tag and left for several days. The theory is that the tape will cut off oxygen or irritate the tag until it falls off.
Risks and Downsides:
Effectiveness: There's little to no scientific evidence that duct tape effectively removes skin tags. It's more commonly associated with wart removal, and even for warts, its efficacy is debated.
Skin Irritation: The adhesive in duct tape can cause skin irritation, redness, itching, or allergic reactions, especially with prolonged contact.
Pain upon Removal: Removing the tape can be painful and may pull at the skin, potentially irritating the tag or surrounding skin.
Infection: Trapping moisture and bacteria under the tape can create an environment ripe for infection.
Misdiagnosis: Covering a suspicious lesion with tape prevents proper observation and can delay diagnosis.
Step-by-Step (with strong warnings):
DO NOT USE DUCT TAPE FOR SKIN TAG REMOVAL. It's not proven safe or effective.
Clean the area (if you were to attempt this):
Apply tape: Cut a small piece of duct tape slightly larger than the skin tag.
Cover: Place it firmly over the skin tag.
Leave on: Leave the tape on for several days, then remove it. (If the tag is still there, some suggest repeating.)
Monitor: Watch for irritation, redness, or infection.
Why this is a bad idea: This method is largely anecdotal and lacks scientific support. The risks of skin irritation and infection outweigh any potential, unproven benefit.
Method 9: Over-the-Counter Creams, Patches, and Solutions 🧴
Many commercial products claim to remove skin tags at home. These often contain ingredients like salicylic acid, tea tree oil, or other chemicals.
How They're Supposed to Work: These products typically work by chemically burning or drying out the skin tag. Ingredients like salicylic acid are keratolytic, meaning they dissolve the keratin that makes up the skin tag.
Risks and Downsides:
Chemical Burns: Stronger solutions can cause significant chemical burns, redness, blistering, and pain to the surrounding healthy skin.
Ineffectiveness: Weaker solutions may be ineffective, requiring prolonged use, which increases the risk of irritation.
Scarring and Discoloration: Chemical burns can lead to permanent scars or changes in skin pigmentation.
Misdiagnosis: Using these products on a suspicious lesion can damage the tissue, making it difficult for a doctor to diagnose it properly.
Allergic Reactions: Ingredients in these products can cause allergic contact dermatitis.
Cost: While initially cheaper than professional removal, repeated applications and potential complications can make them more expensive in the long run.
Types of Products (with strong warnings):
Salicylic Acid-based creams/solutions: Often used for warts. Can burn healthy skin.
Topical "drying" solutions: May contain various astringent or drying agents.
Patches: Medicated patches designed to be worn over the tag.
Why this is a bad idea: These products are often not regulated as strictly as prescription medications. Their effectiveness is questionable, and the risk of skin damage and misdiagnosis is high. Always be wary of products promising "miracle" cures without scientific backing.
"The internet is a vast sea of information, but not all of it is reliable, especially concerning medical advice. When it comes to your health, always prioritize evidence-based practices and professional guidance."
What to Do If DIY Removal Goes Wrong: Emergency Steps ⚠️
Despite all warnings, if you or someone you know attempts DIY skin tag removal and experiences complications, it's crucial to know what to do immediately. Seek professional medical attention without delay.
Excessive Bleeding
If the skin tag site bleeds excessively and doesn't stop with light pressure:
Apply firm, direct pressure: Use a clean cloth or sterile gauze.
Elevate the area: If possible, raise the affected body part above heart level.
Seek immediate medical attention: If bleeding doesn't stop within 10-15 minutes of continuous pressure, or if it's profuse, go to an urgent care clinic or emergency room.
Signs of Infection
An infection can develop hours or days after an attempted removal. Watch for:
Increased redness and swelling around the area.
Warmth to the touch.
Pus or cloudy discharge.
Increased pain or tenderness.
Fever or chills.
Red streaks spreading from the wound.
If you notice any of these signs, see a doctor immediately. Infections can spread rapidly and become serious if left untreated.
Severe Pain or Swelling
While some discomfort is expected, severe, persistent pain or significant swelling is not normal and indicates a problem.
Apply a cold compress: Can help reduce swelling and pain temporarily.
Take over-the-counter pain relievers: (e.g., ibuprofen, acetaminophen) if appropriate.
Seek medical attention: If pain is unbearable, or swelling is rapidly increasing, see a doctor.
Allergic Reactions
Some DIY remedies, particularly those involving essential oils or other chemicals, can trigger allergic reactions.
Signs: Severe itching, rash, hives, difficulty breathing, or swelling of the face, lips, or tongue.
Immediate Action: If you experience difficulty breathing or severe swelling, call emergency services immediately. For less severe but persistent allergic reactions, stop using the product and consult a doctor.
Remember, attempting to fix a DIY complication yourself can worsen the problem. Always err on the side of caution and consult a healthcare professional. For concerns about skin conditions or minor surgery needs, resources like The Minor Surgery Center can provide expert guidance.
When to Seek Professional Medical Advice: The Safest Path ⚕️
Given the significant risks associated with DIY skin tag removal, the safest and most recommended approach is always to consult a qualified healthcare professional. They can accurately diagnose your skin growth and perform removal procedures safely and effectively.
If You Suspect It's Not a Skin Tag
As emphasized earlier, the most critical reason to see a doctor is to confirm the diagnosis. Only a trained medical professional can differentiate a benign skin tag from a mole, wart, or a potentially cancerous lesion.
"When in doubt, check it out. Your skin is a window to your health, and any new or changing growth warrants professional attention."
Large or Multiple Skin Tags
If you have a large skin tag, or numerous skin tags, professional removal is almost always necessary. Large tags are more prone to bleeding and scarring with DIY methods. Multiple tags might indicate an underlying health condition that needs to be addressed.
Tags in Sensitive Areas
Skin tags on eyelids, near the eyes, genitals, or other highly sensitive areas should never be attempted for DIY removal. These areas are delicate and prone to serious complications, including nerve damage, vision impairment, or severe pain and infection.
Painful, Bleeding, or Itchy Tags
While skin tags are usually asymptomatic, if one becomes painful, starts bleeding without trauma, or becomes persistently itchy, it's a signal to see a doctor. These symptoms could indicate irritation, infection, or, more rarely, a sign of a different type of growth.
For Guaranteed Safety and Efficacy
Professional removal methods are performed under sterile conditions, with appropriate anesthesia, by trained medical personnel. This minimizes the risks of infection, scarring, and pain, and ensures complete removal. You can explore a clinic's approach to patient care by visiting their clinic page.
Consulting a Specialist: Who to See?
General Practitioner (GP): Your family doctor is an excellent first point of contact. They can often diagnose common skin conditions and perform minor removals. They can also refer you to a specialist if needed.
Dermatologist: A dermatologist is a skin specialist. They are experts in diagnosing and treating all types of skin conditions, including skin tags, moles, and skin cancers. For complex cases or concerns about cosmetic outcomes, a dermatologist is the ideal choice.
Minor Surgery Center: Clinics specializing in minor surgical procedures, like The Minor Surgery Center, have experienced teams dedicated to safe and efficient removal of skin lesions. You can learn about their expertise on their team page.
October 2, 2025
🇨🇦
Our clinic currently provides care to patients within
Canada only.
We apologize for any inconvenience this may cause.